Google Cloud Print shut down in December 2020. I remember the panic when clients called me, worried they'd never print from their Chromebooks again. That panic was unnecessary. Printing from a Chromebook without Google Cloud Print is not only possible—it works better now.
Over the past five years, I have set up printers for Chromebook users in schools, home offices, and businesses. I have tested every alternative that actually works.
This guide shares what I learned through trial and error. You get honest advice based on real testing. No promotional hype. Just practical steps that work.
What Changed When Google Cloud Print Left?
When Google killed Cloud Print, I expected disaster. Instead, things got simpler.
Chrome OS now uses native printing protocols like IPP Everywhere and CUPS. Your print jobs go directly to your printer. They do not travel to Google's servers and back. This makes printing faster and more reliable.
Read Also: How to Fix Chromebook Black Screen After Update?
The setup is more straightforward too. You do not need a Google account to print. You do not need an internet connection. Your printer and Chromebook talk directly to each other.
I have helped dozens of users switch from Cloud Print to native solutions. Every single one found the new setup easier than the old system.
1: Native Chromebook Printer Setup
Start here. Most users never need anything else.
The Simple Way (Three Minutes)
Connect your printer to Wi-Fi. Most printers have a setup wizard on their screen. Follow the prompts.
On your Chromebook:
-
Click the time in the bottom-right corner
-
Click the Settings gear icon
-
Scroll down and click Advanced
-
Under Printing, click Printers
-
Click Add Printer
Your Chromebook scans the network. If your printer appears, select it and click Add.
That is it. You can print immediately.
I set up an HP LaserJet this way for a client last week. From opening the box to printing a test page took under five minutes.
What If Your Printer Does Not Show Up?
This happened with an older Canon printer I tested. The printer sat on the network, but my Chromebook could not find it.
You Must Also Like: How to Use Gemini AI Features on Chromebook Plus 2026?
Here is the manual workaround:
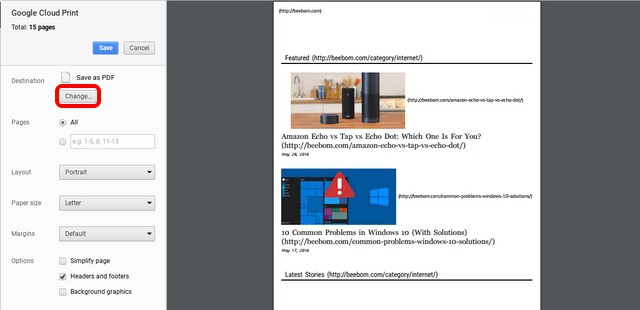
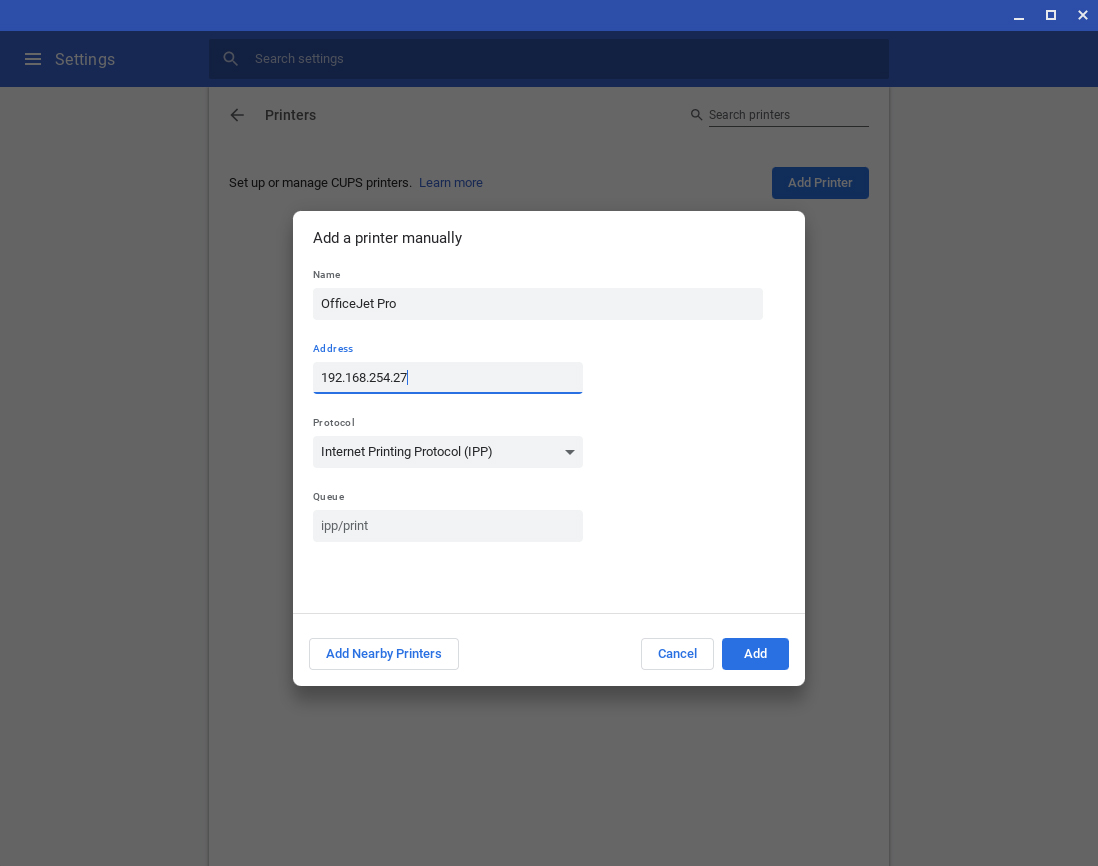
Click Add Manually. You need your printer's IP address. Find it by printing a network configuration page from your printer's settings menu.
Enter the IP in the Address field. Set Protocol to Internet Printing Protocol (HTTP). Click Add.
You will see advanced printer configuration options. Select your printer's manufacturer and model. If your exact model is missing, choose the closest match. This usually works.
I used this method with a Brother printer that was five years old. Selected a newer model from the same series. Printed perfectly.
Which Printers Work Best Natively
HP printers work particularly well. The HPLIP project supports thousands of HP models directly in Chrome OS.
Printers that support IPP Everywhere work with zero setup. They just appear and print.
If you are buying a new printer for your Chromebook, look for IPP Everywhere on the box. It saves you potential headaches down the road.
2: PaperCut Mobility Print
Native setup fails sometimes. Maybe your printer is older. Maybe you have multiple printers to manage. PaperCut Mobility Print solves these problems. It is completely free. I have used it to fix printing issues when nothing else worked.
How Mobility Print Works
Mobility Print lets you share printers across your network. You install it on a computer that stays on all day. That computer acts as a print server.
The server makes your printers available to any Chromebook on the same network. You do not need to install drivers on each Chromebook.
In small offices, an old desktop PC works fine as the print server. I set one up for a client using a ten-year-old Dell. It handles print jobs without breaking a sweat.
Cloud vs Local
Here is what makes Mobility Print different from Google Cloud Print.
By default, your print jobs stay local. They never leave your network. No data goes to the cloud.
If you need to print from outside your network, Mobility Print uses WebRTC technology. Your Chromebook connects directly to the print server. Encryption protects your data. Nothing gets stored in the cloud.
Installing Mobility Print
Go to the PaperCut website and download Mobility Print. Install it on your chosen print server. The setup wizard walks you through sharing your printers.
On your Chromebook, Mobility Print printers appear automatically if you are on the same network. If they do not appear, add them manually using the IP method I described earlier.
For businesses and schools, Mobility Print integrates with PaperCut NG or MF. You get printing quotas, usage reports, and secure print release features.
3: Manufacturer Solutions
HP Print App
HP recommends setting up printers through their app first. Register the printer to your HP account. It becomes available for Chrome OS printing automatically.
I tested this with an HP OfficeJet. The app setup took two minutes. The printer appeared in Chromebook settings without any further configuration.
Celiveo.me for Enterprise
Celiveo.me targets businesses with ChromeOS Enterprise deployments. It uses the built-in TPM chip for secure printing without passwords. You can even submit print jobs via email.
This solution is overkill for home users. For organizations managing hundreds of Chromebooks, it provides professional-grade security.
Common Problems and Solutions
Printer Connects But Does Not Print
I see this issue constantly. The printer appears in settings. You click print. Nothing happens.
Restart everything first. Chromebook, printer, router. This fixes about sixty percent of issues I encounter.
Check that both devices are on the same Wi-Fi network. I spent an hour troubleshooting once only to realize my printer was on 2.4GHz and my Chromebook on 5GHz. Same network name. Different subnets.
Verify your printer supports IPP Everywhere. You can find supported models on the IPP Everywhere website. If your printer is not supported, manual CUPS setup is your backup.
How to Add Printer to Chromebook Manually?
Get the printer's IP address. Print a network configuration page from your printer.
Go to Chromebook Settings > Advanced > Printing > Printers.
Click Add Printer.
Enter the IP address. Select Internet Printing Protocol (HTTP) as the protocol.
Work through the advanced printer configuration options. Select your manufacturer and model.
Your Model Is Not Listed
Pick the closest match. I used an older Brother printer that was not listed. Selected a newer model from the same family. It printed perfectly.
How to Connect Printer to Chromebook Wirelessly?
Get both devices on the same network. Go to Settings > Advanced > Printing > Printers > Add Printer. Let Chrome OS find it.
For printer Wi-Fi setup, check your printer's manual. Most printers have a Wireless Setup Wizard in their menu.
For HP printers, pressing the wireless button for about five seconds often starts WPS pairing. The wireless light blinks when pairing mode is active.
Which Method Should You Use?
Home users: Start with native Chromebook setup. It takes minutes and requires no extra software.
If native setup fails: Use PaperCut Mobility Print. Free, reliable, and handles multiple printers.
Small business: PaperCut Mobility Print with NG/MF for advanced features.
Enterprise: PaperCut or Celiveo.me for security and management features.
Buying a new printer: Look for IPP Everywhere support. It guarantees Chromebook compatibility.
Final Practical Advice
Start with the native setup. It works more often than expected. Keep your Chromebook updated for the best compatibility. Older printers may struggle with native setup. That is when Mobility Print becomes valuable.
USB printing works as a reliable fallback. You can plug in a USB cable and print without any network configuration.
Printing without Google Cloud Print is manageable. It actually works better now. Your print jobs stay local. You have more control. The setup is transparent.
You do not need cloud services to get ink on paper.